How to attach a wood carving knife blade to a handle
This post will answer how to attach a wood carving knife blade to a handle. There are many ways to do this but I will focus on the northwest coast native style of mounting a wood carving knife blade flush to the surface of a handle and my modern adaptation of that style.
Overview
In the northwest coast style a handle is notched for the wood carving knife blade. Then string is wrapped around the blade and handle to secure the wood carving blade to the handle, with the ends hidden under the wrap so no unsightly knot is visible. This style of mounting is great for crooked wood carving knives, curved wood carving knives, hooked wood carving knives and spoon wood carving knives.
Its also suitable for straight carving knives, although some prefer to mount the straight wood carving knives in line with the handle instead of at an angle like most other northwest coast style knives. You can find examples of both curved wood carving knives and straight wood carving knives in this style in my carving knife store.
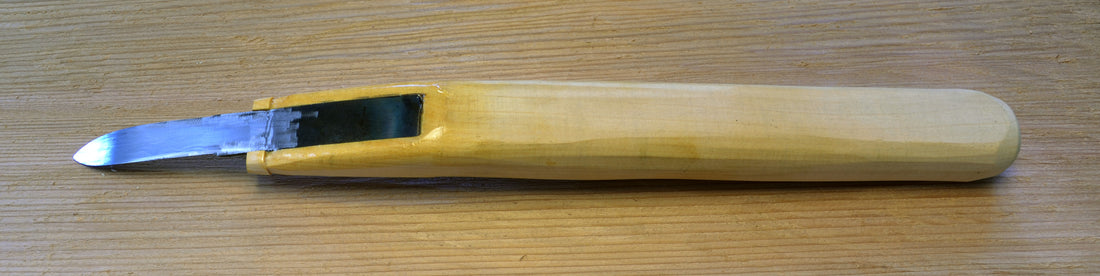
Preparing the wood carving knife handle
To notch the handle for the wood carving blade, first sand the mounting area flat on a belt sander. Place the blade tang onto the handle and trace the tang with a sharp pencil, I prefer a mechanical pencil for its super sharp lines.
Make a cut about the blade thickness deep along the inside of the lines to help reduce tear/chip out. Remove the wood inside the lines with a chisel to a depth of the blade. Test fit the blade often to make sure you achieve a tight fit as a loose fit will let the blade rock in use and wear out the pocket if no epoxy is used to fill all the gaps. If the recess for the wood carving knife blade is made accurately enough no glue is needed and the blade can be left slightly proud.
Next a groove all around the tip of the handle must be carved to keep the twine binding from sliding off the handle. I prefer a 1/2"x18" air powered belt sander for this job as it offers amazing accuracy and control.

Gluing the wood carving knife blade into the handle
Now the traditional method depends on a tight fitting notch and very tight string binding to take all the force. But it can always be made stronger by applying glue to fill any gaps and provide extra strength to the wood. As such instead of slightly recessing the blade in the notch, I recess my wood carving blades about 1/16" deeper then the blade thickness and cover the tang and handle notch with epoxy to cast the entire wood carving knife blade into the handle. I also put a thin coat of epoxy over the handle near the notch to further strengthen to handle and blade fitting to create a very strong and durable wood carving knife. By using a thin epoxy and careful application it dries very smooth and most of it is hidden under the binding.
Some other manufactures use countersunk screws to secure their wood carving blades but I find epoxy is extremely secure if you use the right brands. My preferred epoxy is G-Flex epoxy for its long working time and flexible nature after curing. Harder and stiffer epoxies crack because a thin steel blade is actually very flexible while a thick wooden handle is rigid.

Binding the wood carving knife blade into the handle
To bind the carving knife blade into the handle first you make a small tail of string and tightly wrap over it several times till covered.
Next take a loop of string with the ends tied together and wrap the end of the loop under the string. Continue wrapping the string around the handle, carving knife blade and loop till the knife blade is covered. Wrap 3 to 5 more wraps and cut the string with 2 inch long tail. Put the tail through the loop and then pull the loop back under the wraps of string to secure and hide the tail.
Cut the tail if it pokes out from the middle of the wrap with flush cut pliers and poke the end back in between 2 turns with a large dull flat head screw driver.